When homeowners want an alternative to the regular asphalt shingles, a go-to choice is cedar shakes or cedar shingles because of their elegant, rustic style. However, as beautiful cedar shake shingles may be, they come with few problems. But one of the most significant issues is the growth of moss on the shingles themselves, which can cause many other problems down the line.
To explain the effects of moss growing on roof shingles, let’s take a look at why moss grows on roofs, how to remove moss from cedar shake roofs, and a few ways to prevent it, and more!
Why Removing Moss is More Than a Cosmetic Choice
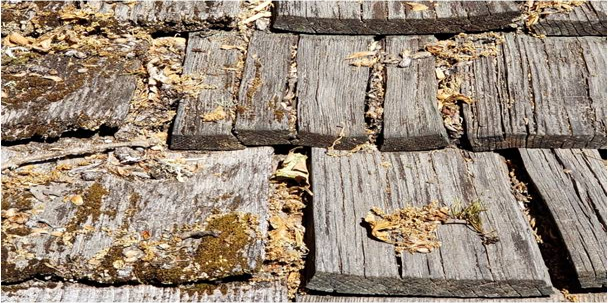
Moss might look harmless (after all, it’s just a bit of green on the roof) but for cedar shake homeowners, it’s anything but.
It traps moisture against the wood, which increases the speed a roof can rot and decay. And over time, this weakens the shakes and causes curling, leading to leaks within the roof. Moss also creates the perfect environment for mold and mildew, which can spread into the home.
Left alone, what starts as a small patch of moss growing on shakes can turn into an expensive repair and even early roof replacement. So while it may seem like a minor issue, moss is actually a headache waiting to happen.
Why Does Moss Grow on Cedar Roofing?
Moss tends to grow on cedar roofs because the wood’s natural texture and absorbency create a perfect environment for moss to take hold. Moist, shaded areas promote moss growth, especially if leaves and debris accumulate, retaining moisture.
To understand how to remove it, you need to know why it shows up in the first place. Here’s what you need to know:
What Causes Moss to Grow on Cedar Shingles
Moss doesn’t need much to thrive. It only needs a few consistent conditions:
- Moisture: Rain, morning dew, or high humidity keeps cedar shakes damp, especially in cooler climates or shady spots.
- Shade: Trees or nearby buildings that block sunlight allow moss to grow without interruption.
- Acidic surface: Cedar naturally grows in acidic soil, and that acidity from soil can often also be found within the same surfaces of wood shingles.
Why Moss Sticks Around
Unlike grass, moss doesn’t need sunlight to stay alive. It only needs a damp, shaded place to anchor itself. And when it grows on cedar shakes, it is able to anchor itself into the textured surface of the roof shingles, which makes it difficult to remove the moss.
Why You Need to Act Early
Put simply, the longer moss stays on your roof, the more it traps moisture, sinks into the shingles, and wears down the wood. Even if the moss growing on the roof looks like a minor issue, it’s already causing damage.
Therefore, knowing how to remove moss from roof shingles— early—is your only option. And it can save you from almost all of the more significant dangers it may cause.
The Hidden Dangers of Moss Growing on Cedar Shakes
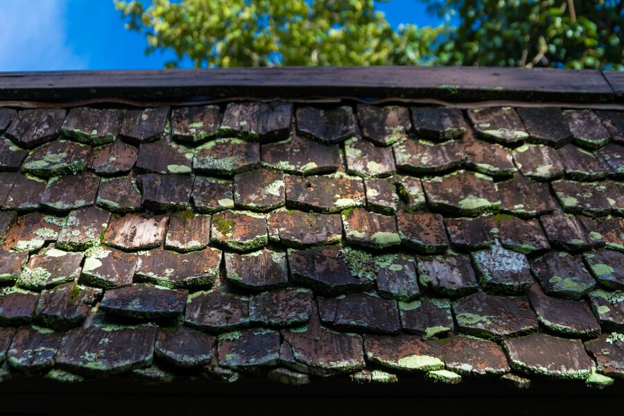
Moss growing on shingles of a roof (especially cedar shakes) might not seem like a big deal at first.
It adds a bit of rustic charm, right? Not quite.
Beneath that green fuzz is a real threat to your roof’s lifespan and structure—and possibly your savings.
Here are the more significant problems of moss growing on cedar roofs:
Water Intrusion
Moss slowly collects water, acting like a sponge that sits on your roof, especially after rain. Once water finds a pathway into the shakes, even a small breach, it can lead to a damaged underlayment that can, eventually, cause leaks, stained ceilings, and rot.
Weaken Shakes
Cedar is tough, but it’s not invincible.
When moss keeps cedar shakes wet, the wood starts to break down, turning soft and spongy. And once one area starts to rot, the damage spreads fast.
Is replacing a few shakes a problem? Not always.
Replacing entire roof sections? That’s a different—and problematic—story.
Mold and Mildew
If moisture gets through the roof, mold can start to grow inside attic spaces.
But mold isn’t just a structural issue. It can also affect indoor air quality and trigger allergies. Not to mention, it can be difficult and costly to remove, especially because it rarely stays in one spot.
Shorter Roof Life
When moss is left unchecked, it puts your roof on the fast track to early replacement.
The constant moisture wears down cedar faster than normal, which means: instead of getting 30 years out of your roof, you might be fortunate to get 15-20.
Insurance Coverage
Here’s something homeowners don’t always expect: insurance providers may deny claims if roof damage is linked to neglect. This includes the moss growing on shingles.
In fact, if moss has clearly been growing for a while, and you don’t have proof you’ve tried to remove it, insurance companies may consider it a maintenance issue, which wouldn’t be covered.
How to Remove Moss from Cedar Roofs Safely and Correctly
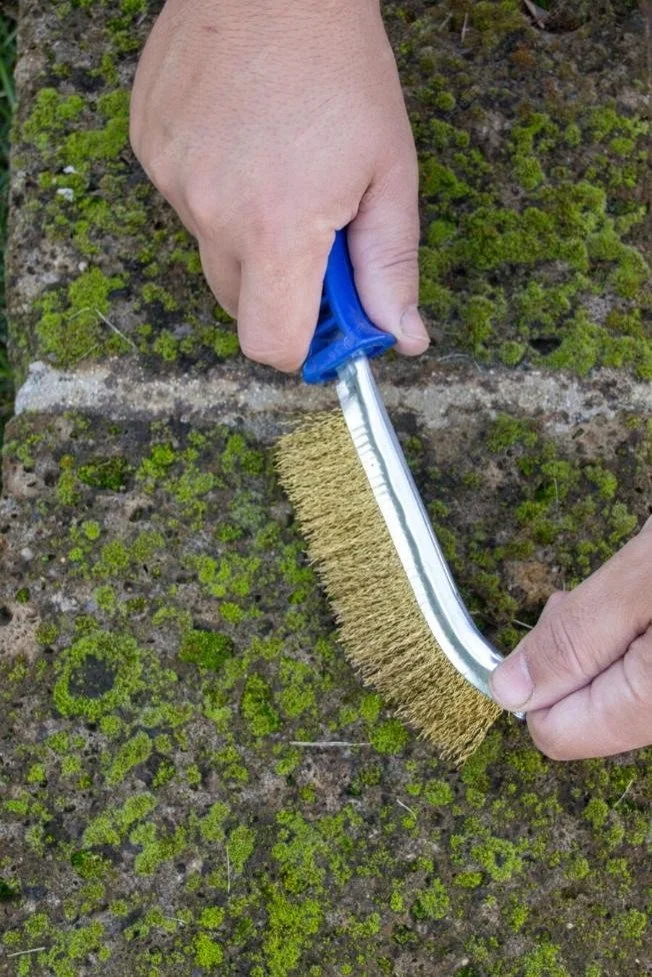
If you’re dealing with moss growing on the shingles of your roof (especially cedar shake) there’s a right way to handle it.
Here’s what you need to remove moss of the roof of cedar shake:
- Safety harness and non-slip shoes
- Extension ladder with stabilizer
- Garden hose with spray nozzle (no pressure washers!)
- Plastic or nylon-bristled brush
- Moss-killing solution (oxygen bleach or vinegar-based for natural options)
- Spray pump or garden sprayer
- Moss control powder (zinc or copper-based)
- Protective gloves and eye protection
Now that you know what you will need to remove the moss, let’s take a look at how to remove the moss off the cedar shake step by step:
Step 1: Stay Safe
Before anything else, you should always stay safe. Cedar roofs can be slippery, especially with moss on them. That’s why it’s important to work on a dry day and never do this alone.
Another thing to keep in mind is that chemical sprays that remove moss can also irritate skin and eyes, so you should always wear gloves and goggles.
Note: If your roof has a steep pitch, you shouldn’t walk on it while cleaning. Instead, you should use a harness or call in a professional.
Step 2: Rinse the Surface Gently
Start by lightly rinsing the roof with a garden hose. But remember, you should never use a pressure washer. The goal of rinsing the moss on the roof is not to blast it off but rather loosen it. A pressure washer can damage the cedar shakes and make your roof worse.
Step 3: Scrub with Care
Using a soft-bristle brush, you need to then gently scrub downward with the grain of the shingles. This will help you not lift or damage the shakes.
Another tip? Work slowly. If you try to remove moss too quickly, you could create accidental damage to a few shakes, which could damage a larger area of the roof at once.
Step 4: Apply a Moss-Killing Solution
Once you’ve removed as much moss as possible with the soft-bristle brush, you need to treat the rest of the most that is growing on the roof with a solution.
If, however, you prefer to use a natural solution, you can mix one part vinegar to one part water and apply it with a spray pump bottle.You could also use oxygen bleach because it won’t stain—unlike chlorine bleach.
Then, let the solution sit for 20–30 minutes and rinse it again with a hose.
Step 5: Apply Moss Control Powder
Removing the moss of the roof also means ensuring it doesn’t come back, so after you remove the moss, sprinkle a moss control powder along the ridge line of the roof.
Once it rains, the powder will slowly rinse down the roof, which creates a moss-resistant coating.
Step 6. Check for Damage
After cleaning, inspect the roof for any signs of lifted, split, or rotted shakes. If anything looks questionable, have it repaired—quickly—and plan to inspect your roof every 6 to 12 months after.
Methods You Shouldn’t Use to Remove Moss
Now that we’ve gone over the correct steps of how to remove moss from your roof, you need to know which methods not to use when removing growing moss on shingles.
Here are the top methods to avoid altogether.
Pressure Washing
We have hinted at this before, but it’s worth mentioning again. Although pressure washers might blast moss off the roof, it can also easily take shakes with it while stripping protective granules and cedar fibers.
Scraping with Metal Tools
Metal brushes, scrapers, or putty knives can also seem like a good method of removing moss. But they’re not.
Sharp tools can gouge the surface of cedar shingles, break edges, and even tear into the underlayment of the roof, which could lead to a whole array of other problems.
The best tool to remove moss is always a soft-bristle brush designed for roof cleaning.
Using DIY Vinegar Without Rinsing
Although vinegar can be used to help you remove moss from shingles naturally, it needs to be rinsed off properly. If not, the vinegar solution can discolor your roof and create an unsightly appearance.
Tips to Prevent Moss Growing on Your Roof
Now that you’ve learned how to remove moss growing on your roof shingles, the next step is knowing how to prevent it. And if you want to know how, keep reading!
Schedule an Annual Inspection
One of the best ways to stop moss from growing is by getting your roof inspected at least once a year, especially if you don’t feel comfortable climbing on the roof yourself.
During the process, inspectors will look for loose shakes, areas where water pools, and early signs of moss growth—including mold and mildew.
Trim Overhanging Branches
Moss thrives in shades, and if your roof rarely sees sunlight because of tree cover, you’re practically inviting moss onto your roof. To fix this, prune back tree limbs so more sunlight can hit your roof and speed up drying.
Install Zinc or Copper Strips
Zinc and copper are natural moss deterrents, which is why installing metal strips near the ridge line of your roof allows rainwater to wash trace amounts of the metal down over the surface.
The runoff creates a moss-resistant coating on the shingles—without harming the cedar. It’s also a low-effort solution that can work especially well on roofs that already had moss issues in the past.
The Moss-Free Alternative: CEDUR Synthetic Roofing
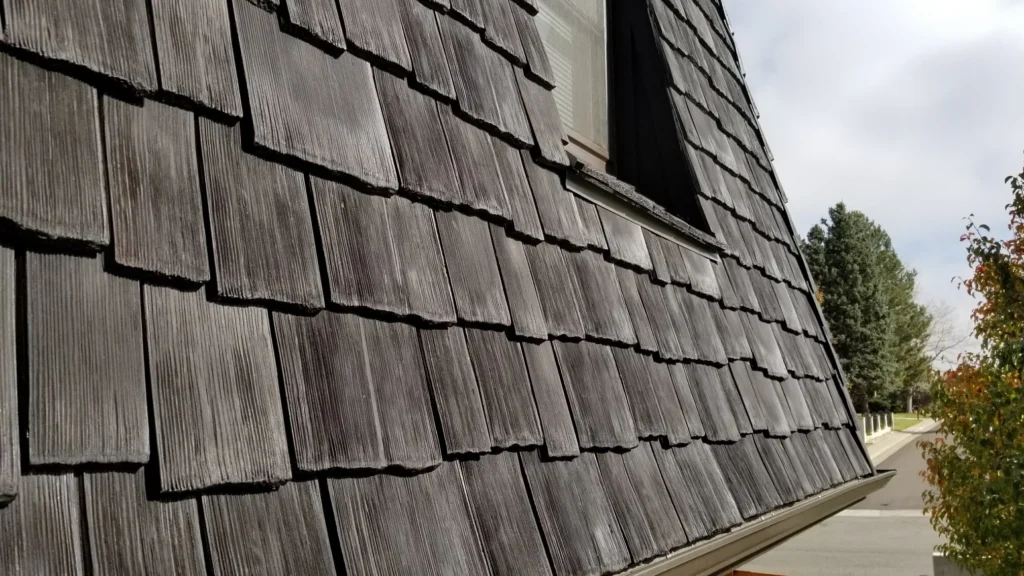
CEDUR’s synthetic cedar shakes are one of the best roofing materials to prevent moss from growing on your roof. Plus, they look like real wood cedar shakes but do not have the same downsides.
Unlike traditional cedar shakes, CEDUR synthetic shakes do not hold moisture or have an acidic surface—the primary factors that develop moss, algae, and mold.
Even with regular maintenance, keeping moss off a cedar shake roof is an ongoing battle, but with synthetic cedar, the battle never starts.
The Durability of CEDUR Synthetic Shakes
CEDUR synthetic shakes also have an incredible lifespan, one that lasts without continuous maintenance. The shakes are designed to have a Class A fire rating and impeccable impact resistance.
On top of that, the material is designed to mimic the rich look of hand-split cedar, coming in four distinct coloring options:
Use CEDUR to Stop Removing Moss for Cedar
Knowing how to remove moss on your roof shingles is only the start. If you truly want to stop having mold on your roof, you need to invest in a quality roofing solution.
CEDUR roofing is just that.
Want to know what CEDUR looks like on a real roof, take a look at our gallery or request a sample! Want to learn more about the benefits of CEDUR roofing materials? Contact us today